#ff5f1d
191808
0
1
Mar 25, 2013 13:46:32 GMT -8
ProBoards Help Guide
47
March 2013
helpguide
|
Post by ProBoards Help Guide on Apr 22, 2013 15:50:19 GMT -8
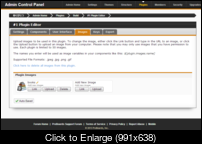
Images can be uploaded directly to your plugin, eliminating the need to upload any images you plan to use in your plugin to an external source. In the admin panel, select Plugins, then select Build on the next page. Click on the name of the plugin you're working on. On the following page, click on the Images tab. You have the option to either link to an image that's hosted online or to upload your own image directly into your plugin. To Link an Image- Select the Link button.
- Enter the URL of the image you want to add to the plugin.
- Press the Enter key and your image will be added.
To Upload an Image- Select the Upload button.
- Select an existing file on your computer. The image will automatically be uploaded to your plugin on the same page.
You can also replace existing images using this same method, or remove the images using the Delete button next to its respective image.  Clicking on the  icon next to an image allows you to edit the name of the image. This name will be used when addressing your image in your plugin's coding, via $[plugin.images.name] (substituting "name" with the name of the image). Source: www.proboards.com/developer-guide/plugins/uploading-images |
|


 icon next to an image allows you to edit the name of the image. This name will be used when addressing your image in your plugin's coding, via $[plugin.images.name] (substituting "name" with the name of the image).